| 619 | Shoe Kit | 2012-04-11 |
During the summer of 2009, we climbed the 54 official 14000 feet peaks in Colorado. On that trip I carried six pair of shoes to use on the hikes and climbs. The footwear ranged from lightweight mountaineering boots to sandals.
We used the lightest weight shoes possible. By using trekking poles, we were able to avoid wearing heavy boots unless we needed the heavier boots to help keep our feet warm or to help with traction.
Lightweight shoes are lightweight. They cannot take the abuse of a big boot. So, the everyday climbing was very hard on my old shoes. I destroyed my old favorite, Nike Exum Ridge shoes, a pair of Five Tennies, a pair of La Sportiva Boulders, and a pair of Nike Pegasus Trail shoes. Destroyed means, I could no longer repair the shoes and so they ended up in the trash.
 Every night in camp, I glued, taped, and tied the shoes back together to try and get one more mountain out of them. Oh, I had still had shoes and boots that I could wear, but they were not my favorites. A new pair of Salomons purchased during the trip, became my regular shoes. The Salomons had "indestructible shoelaces". The laces were naturally torn by the end of the trip. The moral is: if you wear lightweight shoes, be ready to repair them.
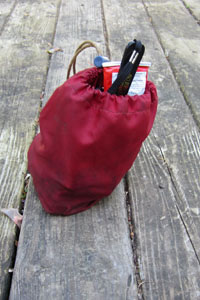
To aid in our shoe repair, we pack a shoe kit on extended trips. The kit is just a small ditty bag with most of the things we need to clean and repair our shoes.
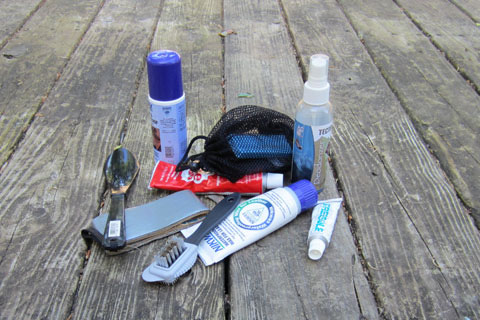
The products we keep in our simple shoe kit are ...
- Shoe Goo - comes out very thick, we spread it with a match stick
- Freesole - a similar glue that is easier to spread, we use both, if one does not seem to work we use the other
- Duct Tape - to help with repairs
- Nikwax - Wax for Leather - similar to the old Sno Seal, a waxy paste that helps to waterproof and protect the leather
- Nikwax - Fabric and Leather Proof - most of our shoes are a combination of fabric and leather, we have had mixed results on the effectiveness
- Spare Shoelaces - re-tie the broken laces on the trail and replace them when you are back at the car or home
- Shoe Horn - for boots without a stiff heel
- Boot Brush - a great little brush that has four different cleaning tools, we think it is indispensable
- Textron Deodorizer - unless you like the smell of sweaty boots
And a few shoe kit tips ...
Clean your shoes after every hike and inspect them for wear.
Give the glue time to set and dry - especially if gluing a flappy sole back on.
We have also used Seam Grip, Barge Cement, and Super Glue.
Use straps, tape, a large rock, or drive and park your vehicle on the shoe to help set the repair spot while is is drying.
A bit of duct tape and string can temporarily repair most problems on the trail.
The Boot Brush is as good as it gets. We were surprised by how well it worked. It is a well spent $5.
We have never tried a waterproofing test on our shoes, but in our humble opinion, no product seems to work.
In the summer, do you really want waterproof shoes? I used to waterproof my boots each fall before the first cold weather trip, but never in the summer - I wanted the boots to breathe in hot weather.
Don't be afraid to take the shoes in for a repair. If the shoes are still in relatively good condition a repair job might just be all you need.
If you are going on a backcountry overnight trip, make sure your shoes can handle the rigors of the trip.
Store your shoes in a cool area and avoid many re-gluing projects.
All the products are available at REI and some of the other Affiliates. The Boot Brush and the Deodorizer are worthy investments. They make for happy shoes and a happy wife : - )
Happy Shoe Kit trails