| 644 | Sewing with an Awl | 2012-05-16 |
In order to do simple gear repairs, you need to know how to sew. I learned the basic sewing skills as a Boy Scout (my mom instructed the troop on how to sew.) We didn't get a merit badge for our new skills, but we were able to sew our merit badges and other patches onto our uniforms. Sewing is an important skill.
Later in life while sailing, I learned even more about sewing and in particular, how to mend a sail with an awl. If you sail very often, you are repairing sails very often.
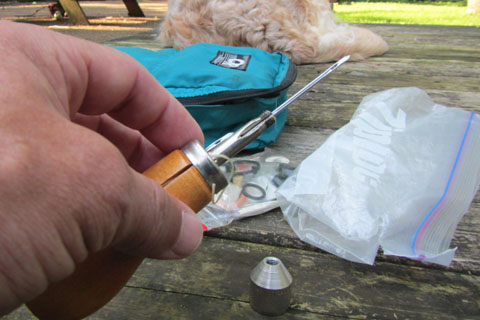
Sewing with an awl is not very difficult, but it does take a bit of practice to learn the basics. I am using the Speedy Stitcher Sewing Awl, but we also have two other smaller awls in our repair kits. They all work similarly.
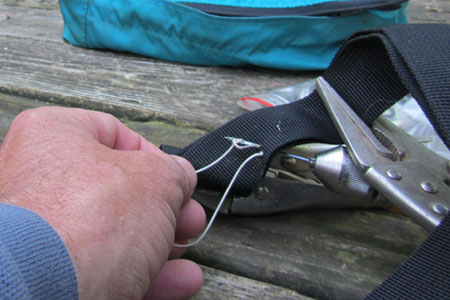
Setup and threading - Remove the chuck lock (in above picture my thumb is pointing to it) and place the straight needle in the threaded shaft. (I had to tap the awl to seat the needle). Make sure the groove in the needle is in line with the groove in the handle. The thread then come from the bobbin (stored in the handle) out the hole in the handle and around the tensioner brad (once around and then under so that it provides tension). Next, feed the thread along the groove of the handle (you might have to snip the thread for a clean cut for treading) and through the hole in the ferrule (the metal cap for the handle). Finally, the thread goes along the groove in the shaft and needle and into the hole of the needle. Re-place the chuck lock and pull the end of the thread out from under the chuck.
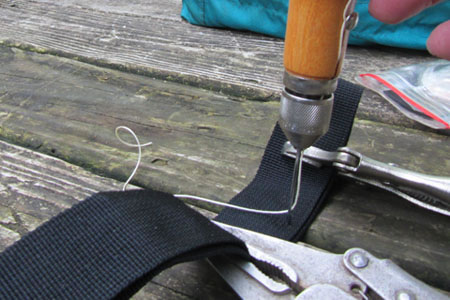
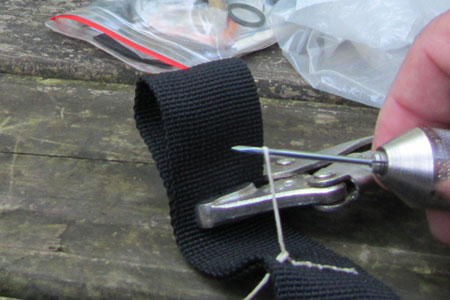
Sewing area setup - I like to use a surface with spaced boards such as a picnic table or a deck. To hold the material I am sewing together, I find vice grips are handy. Position the material over the space between the slats of wood.
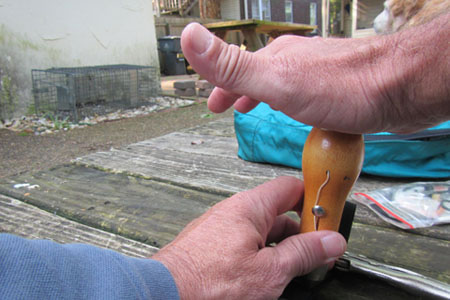
Punch the awl through the material. It might require a hitting the awl with the heel of your hand.
Make sure the awl goes in all of the way. Pull back on the awl a bit and take the loose end of the thread and pull it through the hole. A small nail or other pointed object might help to make the loop large enough to pull.
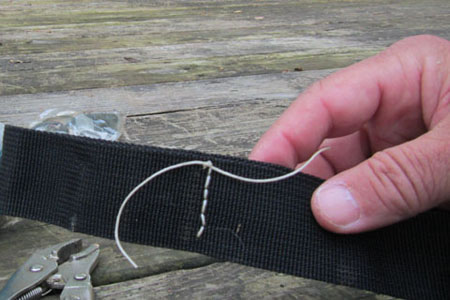
It is important to pull enough thread through the hole to match the sewing distance. Measure at least the distance to be sewn and add a couple more inches. You definitely don't want to come up short of thread, but having too much thread makes the work more difficult.
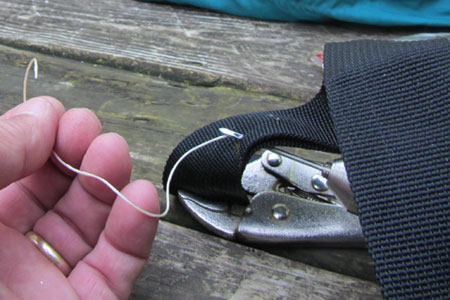
Pull the needle back through the material. The awl should now be on one side of the material and the loose end of the thread should be on the other side. Position and punch the awl through the material close to the first hole. This is the first stitch! The closer the stitches are together - the stronger the seam. Push the needle all the way through and then pull back on the needle. Looking at the underside, a loop forms along the needle. Feed the thread through the loop.
Pull the needle out of the hole. Holding the loose end of the thread, pull the awl until the locked stitch comes to the top. Tighten both ends of the thread.
Continue sewing until the end of the desired seam. Make sure you have enough thread left to tie off the ends. Then push the needle through one last hole. Pull the awl back to make the loop. Pull a few inches of extra tread through the hole and then cut the thread. Remove the awl. Now, both ends of thread should be on the bottom of the material. Tie a simple square knot and I like to add a good drop of Seam Grip over the knot.
To make the seam stronger, zig zag the stitches or go to one end of the seam and then return - for two seams.
If the material needs to be waterproof, use Seam Grip on each hole.
Maybe this summer, while Amy and I are traveling, we will make a Placing Grommets and Sewing with an Awl videos.
Y'awl have fun now!
Happy Awl trails